If you’re an avid kayaker, you know how important it is to have a reliable way to transport your kayak from place to place. Whether you’re heading to a nearby lake for a day trip or embarking on a longer journey, you need a safe and secure way to get your kayak to your destination. That’s where a J-rack comes in!
A J-rack is a type of roof rack that is designed to hold kayaks securely on top of your vehicle. The name “J-rack” comes from the shape of the rack, which resembles the letter J. When properly installed, a J-rack provides a stable and secure platform for your kayak, allowing you to transport it safely and with ease.
One of the great things about a J-rack is that it’s a popular option for solo kayakers who need to load and transport their kayak by themselves. While loading a kayak onto a J-rack may seem daunting at first, with a bit of practice and the proper technique, you can quickly become a pro at loading your kayak by yourself.
In this article, we’ll explore how to load a kayak on a J-rack by yourself, providing a step-by-step guide to help you transport your kayak safely and efficiently.
Here’s a brief overview of the steps to follow when loading a kayak on a J-rack by yourself:
- Step 1: Prepare Your J Rack
- Step 2: Place Your Kayak Next to the J Rack
- Step 3: Lift the Kayak Onto the J Rack
- Step 4: Adjust the Kayak on the J Rack
- Step 5: Secure the Kayak with Straps
- Step 6: Double Check the Kayak’s Security
Jump To A Section
Step-by-Step Guide to loading kayak on j rack alone
Whether you’re an experienced kayaker or a beginner, proper transportation of your kayak is crucial to ensure a safe experience. One of the most popular methods for transporting kayaks is using a J rack. This allows you to attach your kayak to the roof of your vehicle securely.
Let’s dive into the step-by-step process of loading a kayak on a J rack by yourself.
Step 1: Prepare Your J Rack
Before you begin loading your kayak, it’s important to ensure that your J rack is properly installed and in good condition. Check your vehicle’s manual or the manufacturer’s instructions to confirm the correct installation of the J rack. Inspect the J rack for any damage or wear and tear, such as loose bolts or cracks, that could compromise its stability during transportation.
Step 2: Place Your Kayak Next to the J Rack
Position your kayak next to the J rack, with the cockpit facing up. Make sure the kayak is centered and perpendicular to your vehicle. It’s essential to take your time to ensure your kayak is correctly positioned before attempting to lift it onto the J rack.
Step 3: Lift the Kayak Onto the J Rack
Standing on the side of the kayak opposite the J rack, lift the kayak onto the J rack.
To do this, grab the kayak’s cockpit rim with both hands and lift the kayak over your head. Carefully walk the kayak over to the J rack and place it onto the J cradle.

Step 4: Adjust the Kayak on the J Rack
With the kayak on the J rack, adjust its position to ensure it’s securely in place. Make sure the kayak is centered on the J cradle, and the cockpit is facing down. Adjust the J cradle so that it supports the kayak’s weight in the center and the kayak’s hull is resting against the J rack’s padded arms.
Step 5: Secure the Kayak with Straps
Once the kayak is in place, secure it with straps. Attach one end of the strap to the J rack’s anchor point and the other end to the kayak’s anchor point.
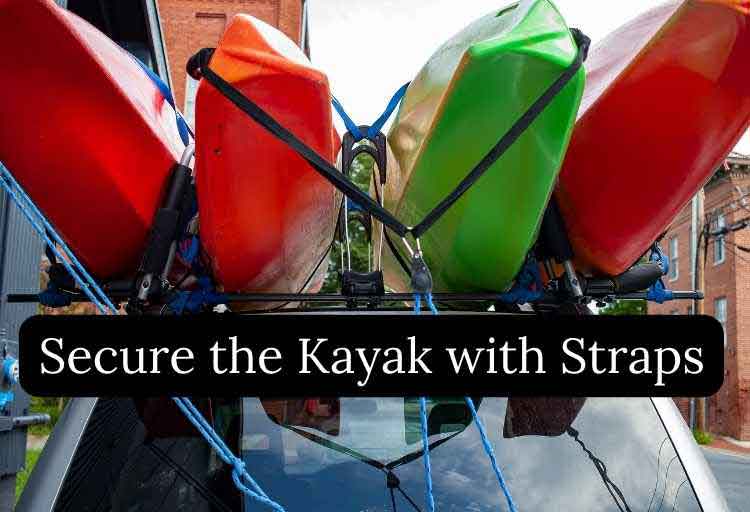
Tighten the strap to secure the kayak to the J rack. Repeat the process with the other strap on the other side of the kayak.
Step 6: Double Check the Kayak’s Security
Before hitting the road, double-check the kayak’s security. Give the kayak a firm shake to ensure it’s securely in place. Make any necessary adjustments to the straps or kayak position to ensure it’s safe for transport.
Top 3 J Rack For Solo Kayak Loading
If you’re an avid kayaker and enjoy exploring new waterways, then you’ll need a reliable and efficient way to transport your kayak to your desired destination. One of the best options for loading your kayak alone is a J-rack, which attaches to the roof of your vehicle and provides a stable and secure platform to transport your kayak.
Let’s take a closer look at the top 3 J-racks for solo kayak loading, exploring their unique features and benefits to help you make an informed decision when choosing the best J-rack for your kayaking adventures.
Thule Hull-a-Port Pro XT
This is a premium J-rack that provides excellent support and stability for your kayak during solo loading. It features sturdy aluminum construction and adjustable padding to ensure a secure fit for your kayak. Its foldable design makes it easy to store when not in use, and it can accommodate kayaks up to 36 inches wide and weigh up to 75 pounds. The Hull-a-Port Pro XT also includes a built-in locking system to keep your kayak safe and secure during transport.
Yakima JayLow
The Yakima JayLow J rack is a versatile and affordable option for solo kayak loading. It features a dual-position design that allows you to carry your kayak in either a J-cradle position or a stacked position. The JayLow also has an adjustable slider that makes it easy to load and unload your kayak from the side of your vehicle. This J-rack can accommodate kayaks up to 80 pounds and up to 36 inches wide.
Malone Downloader
The Malone Downloader is a high-quality J-rack that is designed to provide excellent support and stability. It features a steel construction with a powder-coated finish to protect against rust and corrosion. The Downloader also includes oversized padding to protect your kayak from damage during transport.
This J-rack can accommodate kayaks up to 36 inches wide and weigh up to 75 pounds. It also features built-in safety straps and a corrosion-resistant coating for added durability.
All three of these J-racks are great options for solo kayak loading, but they each have their own unique features that set them apart. The Thule Hull-a-Port Pro XT is a premium option that offers superior stability and security, making it ideal for long-distance travel. The Yakima JayLow J rack is a versatile option that can be used in both J-cradle and stacked positions, making it perfect for kayakers who frequently switch between different kayaks. The Malone Downloader is a durable and affordable option that provides excellent support for your kayak during transport.
Additional Tips for Loading a Kayak on a J Rack
Loading a kayak on j rack solo might be tricky for the first time! Before you start loading your kayak onto the J rack, make sure your vehicle is parked on a level surface. This will provide a stable base and make it easier to load your kayak.
Here are some additional tips for loading a kayak on j rack without help;
Aligning the kayak properly on the J rack
Aligning the kayak properly on the J rack is crucial for safe and secure transportation.
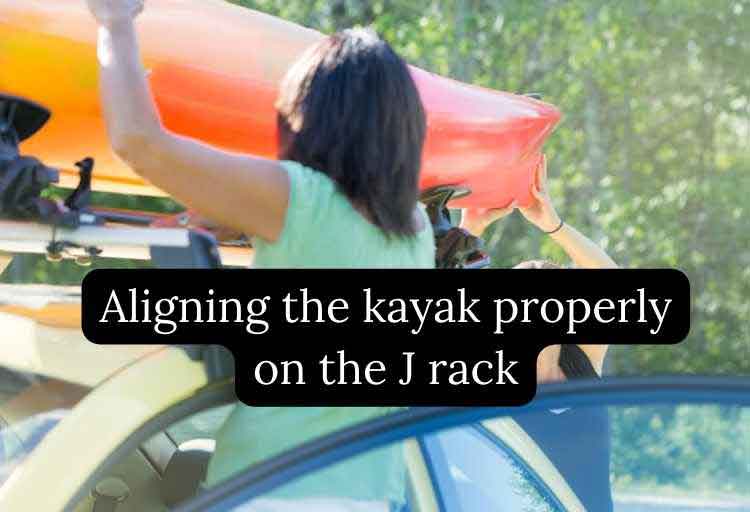
Use alignment markers: Some J racks come with alignment markers that can help you position the kayak correctly. If your J rack does not have alignment markers, you can make your own by using tape or markers.
Position the kayak before lifting: Before lifting the kayak, position it on the ground to ensure that it is centered on the J rack. This will make it easier to lift the kayak onto the rack and reduce the risk of it shifting during transportation.
Keep the kayak balanced
One common problem when loading a kayak onto a J rack is that it can be difficult to keep the kayak balanced while lifting it onto the rack. If the kayak is not balanced properly, it can tip over and potentially damage the kayak or your vehicle.
Here are some additional tips to help solve this problem:
Use a towel or foam blocks: To prevent the kayak from sliding around on the J rack, place a towel or foam blocks on the rack before placing the kayak on top. This will provide some traction and prevent the kayak from shifting during transportation.
Adjust the straps: Once the kayak is on the J rack, adjust the straps to ensure that the kayak is secure and balanced. Tighten the straps evenly on both sides to prevent the kayak from shifting during transportation.
Use a small ladder to reach the J rack
There are a number of tools and accessories available that can make the process of loading a kayak onto a J rack easier and safer. For example, you might consider using a step stool or small ladder to reach the J rack or using foam blocks or a towel to help prevent the kayak from slipping during the loading process.
Finally, loading a kayak onto a J rack by yourself can be challenging. But with practice, it can become easier and more manageable. Remember, the more you practice loading your kayak onto a J rack by yourself, the easier it will become. With each attempt, you’ll learn what works and what doesn’t, and you’ll develop your own techniques that make the process smoother and more efficient.
So, feel free to give loading a kayak onto a J rack a try by yourself, but also be willing to seek assistance and use the tools available to you if needed.